Build, setup and turn in on
This is third part of guide on Shift states.
« Intro to custom keyboard layouts and Step 1: Open
« Steps 2 and 3: Understand and assign symbols
In third part I'm going to talk about building your own custom layout and turning it on. Also, I'm going to talk about setting all the things right so you get maximum pleasure with your new layout. Steps 4 and 5 of guide on keyboard layout making and setting are here.
Step 4: Build and Setup
Now, when you have assigned all the symbols you use to your virtual keyboard, lets bring them into real life.
In the topmost menu click Project. Just for fun, you can choose to test your new keyboard layout. Here's me testing mine.

I hope, you're happy with what you assigned, and so I'm going to show you how to apply this.
If you've got some spare time - you may like to take a look at Project ➢ Properties.
Choose Project again. Build DLL and Setup Package.
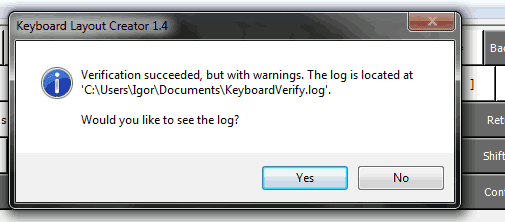
I hope you've got it all built successfully. By succesfully I mean withought any errors. Warnings aren't a real problem. If no - view log and try to fix the errors.
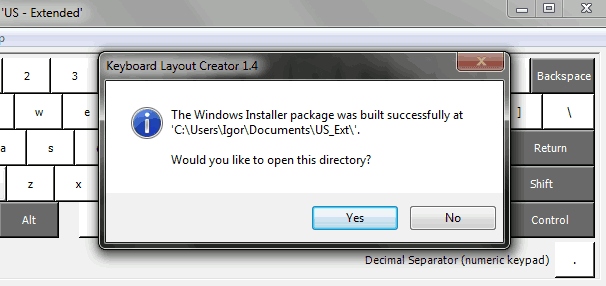
Open layout's new folder.
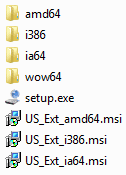
Activate setup. The installation may take a while. Up to 2 minutes, as of my personal experience.
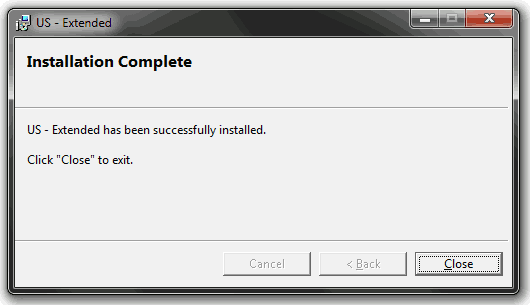
When closing the Layout Creator, you may want to save your new layout. But that's not necessary, as you can load it in Load Existing Keyboard.. later if you'll want to change something.
Step 5: Turn on your custom layout
After the installation was complete, notification window will pop up (look at the previous picture). Your layout will be set up, so you can see your new keyboard layout in language settings.

Choose your new layout to find out that it works great.
Problem
You may face a little problem here. A problem that might irritate and mislead you very much. I faced it too. Here it is:
Open Notepad. Try inputting symbols. You get them? Probably, no. I don't. Why?
Check the language bar again. Windows had automatically chosen the default layout again. >:( Choose your custom one and find out that it works fine here too.
Optional: Configuring for peace
In order for you and computer to better understand each other and live in peace, there are two ways. You can set your new layout as default, or do two other things.
Custom icon
Setup a custom icon for your layout. Here's how to do it.
Go to language settings ("Text services and Input Languages" dialog).
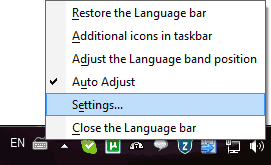
- In Installed services choose your custom layout.
- Click Properties.
- Click Change Icon.
- Choose an icon for your layout.
Now, you'll know when your layout is active. Her new icon will appear.
Shortcut
Configure a shortcut to swap keyboard layouts fast.
- Get into the the same settings dialog.
- Choose Advanced key settings.
- In Hot keys for input languages, choose Between input languages.
- Click Change Key Sequence....
- In Shift Keyboard Layout choose (recommended) Left Alt + Shift.
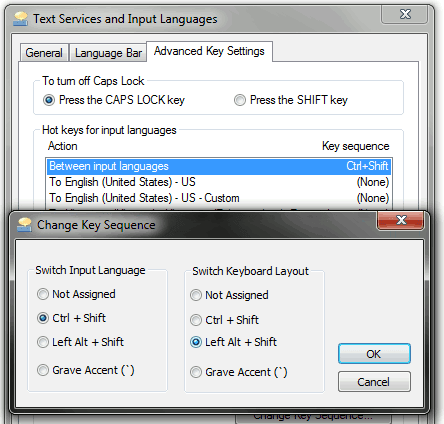
Now you can easily switch between layouts by simultaneously pressing Left Alt and Shift.
Optional: Default layout
You can make your new layout default. If you'll do so, you won't have to switch layouts (Left Alt + Shift) every time you want to write symbols.
- Get into the the same settings dialog.
- Choose Advanced key settings.
-
In Default input language, choose your new custom layout.
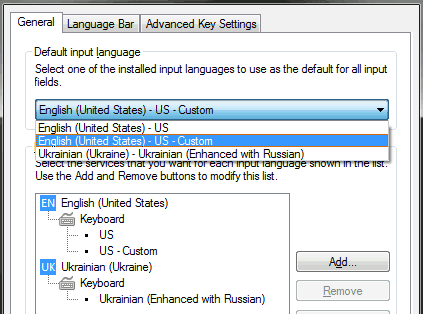
- Apply changes.
- Optional: In Installed services choose your old keyboard layout.
-
Optional: Remove it.
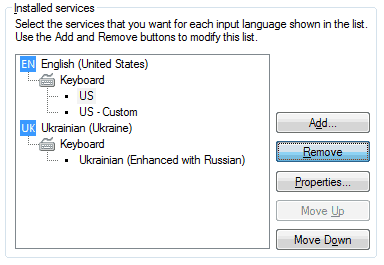
Now, that you have set it as default you can type symbols from your keyboard in the most easy way. Enjoy it. ;)
Guide
« Intro to custom keyboard layouts and Step 1: Open
« Steps 2 and 3: Understand and assign symbols
| Part 1 | Part 2 | Part 3 |
|---|

